It’s a thing that I had to do while updating Alchemistry to be Steam Deck compatible, and documentation wasn’t helping me, because there are plenty of use cases.
So here we are, here’s a small tutorial on how to set up an official controller configuration based on your or a community-created one.
Create your configuration (Steam Deck or Big Picture version)
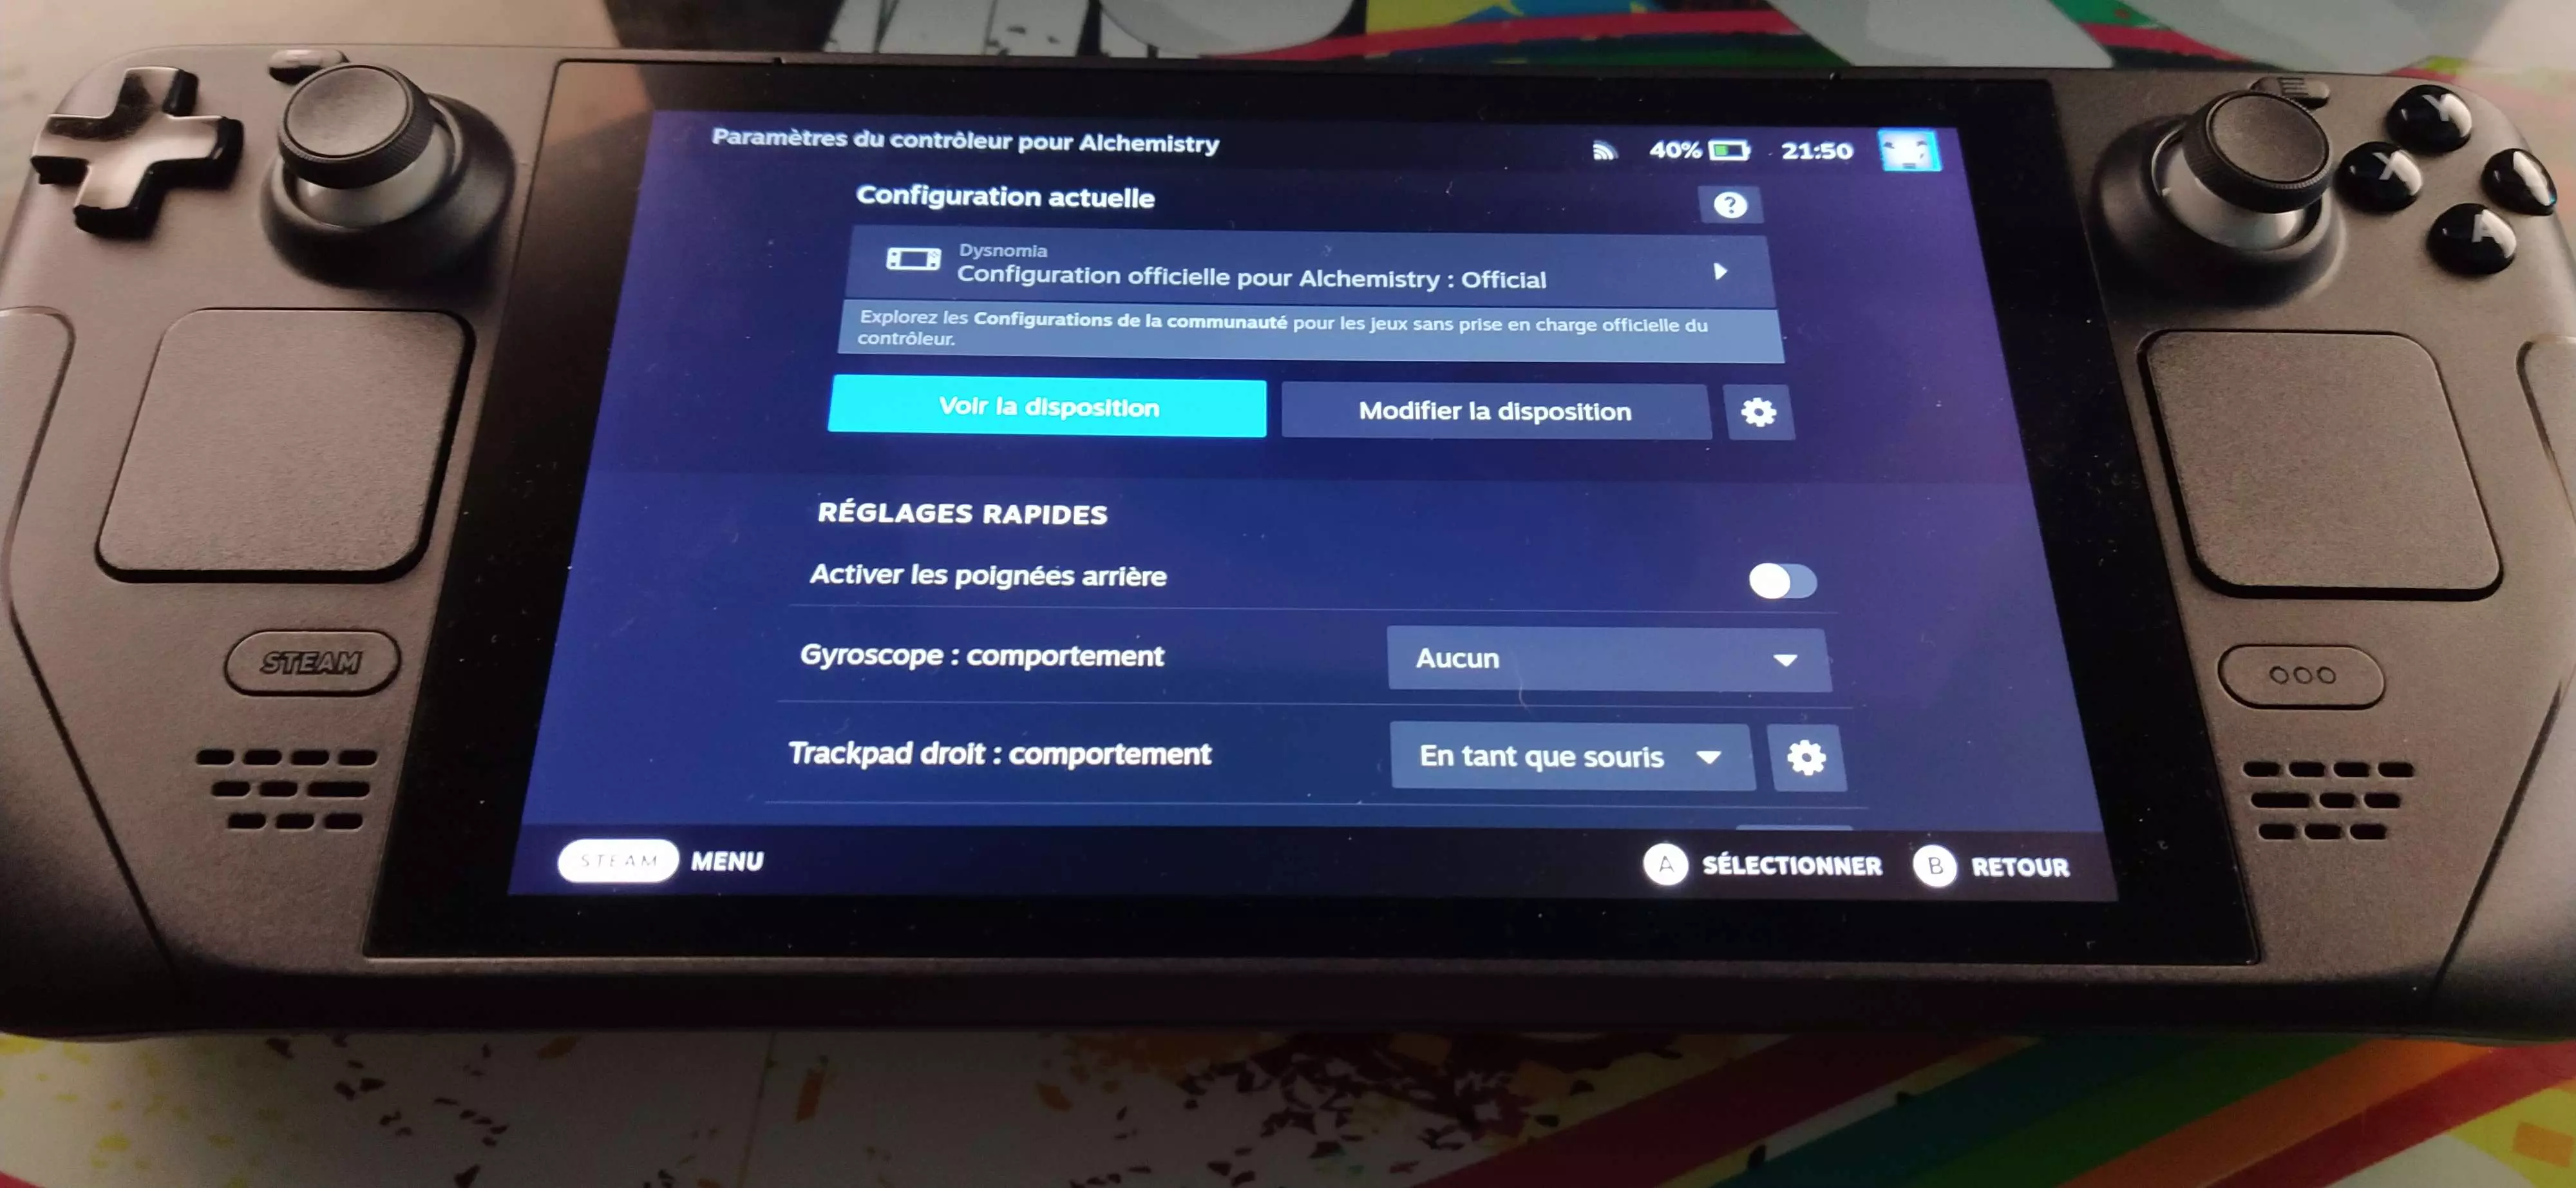
To access controller configuration, click this icon: 
Then, edit the selected layout (if it doesn’t exist, choose your favorite one in the templates). 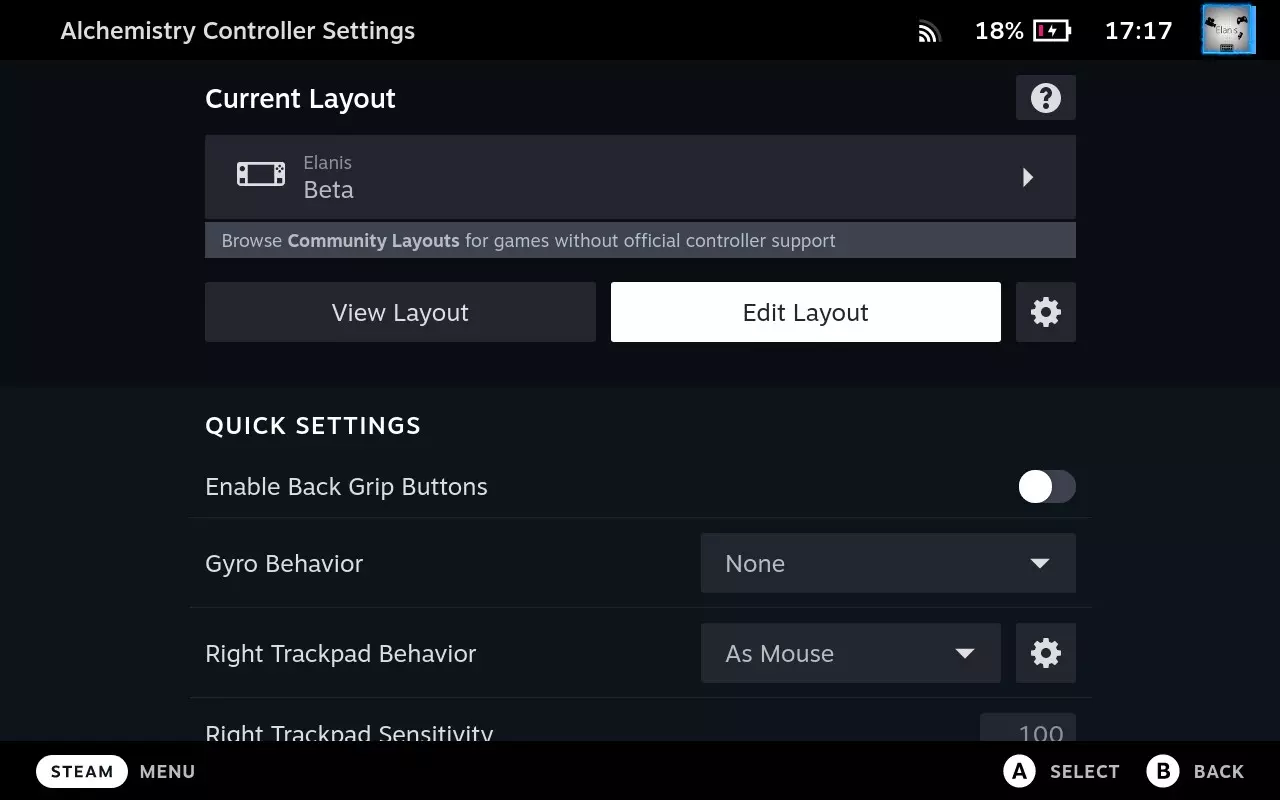
Then, correctly map buttons to game features. 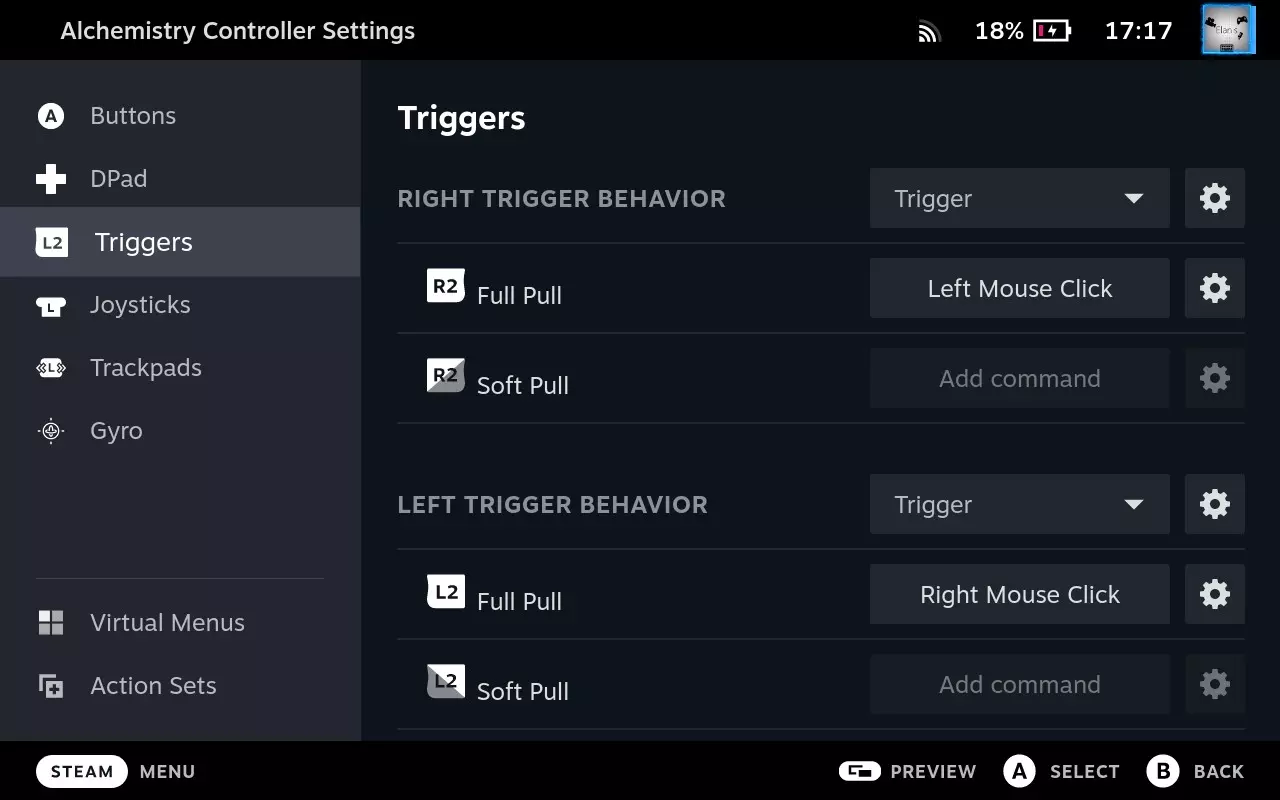
At this moment, you can try your configuration locally and check that everything is fine. You can modify the configuration in-game by pressing the Steam button and choosing controller settings.
Finally, share the configuration with the community: 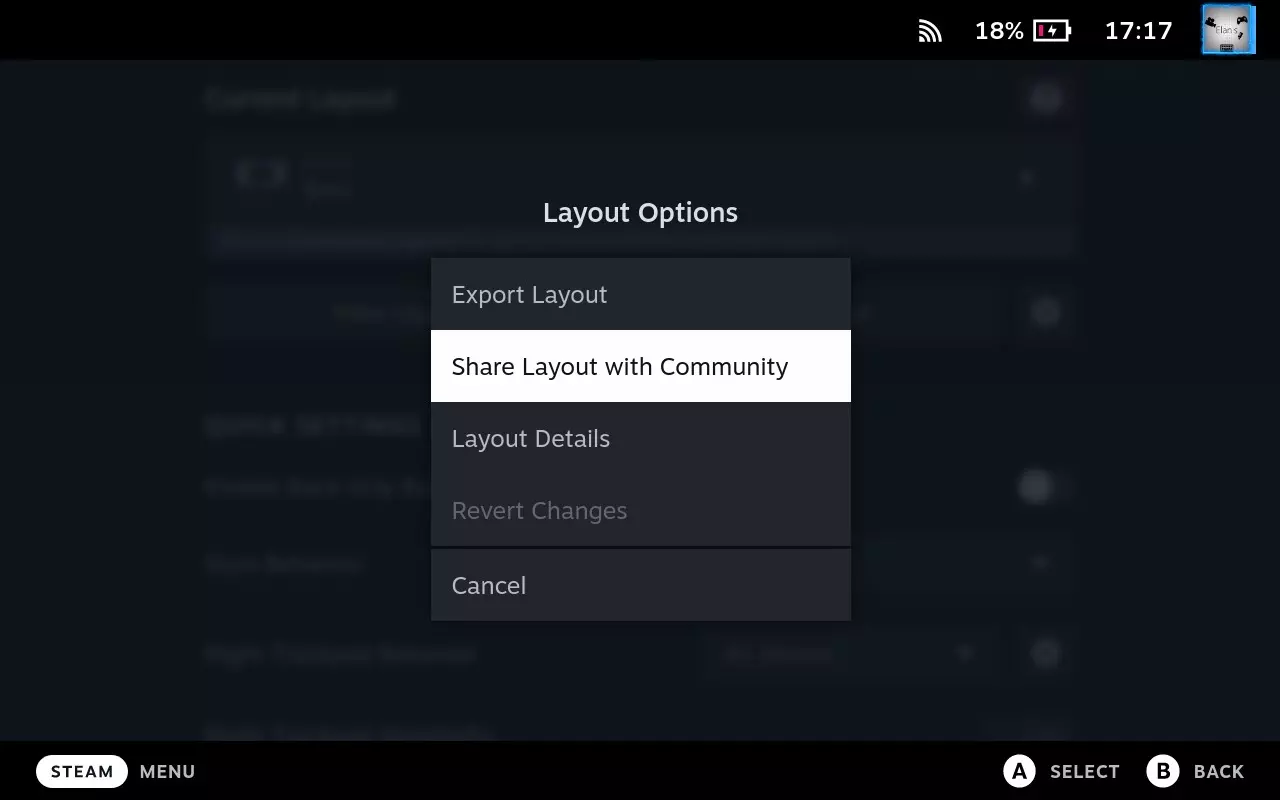
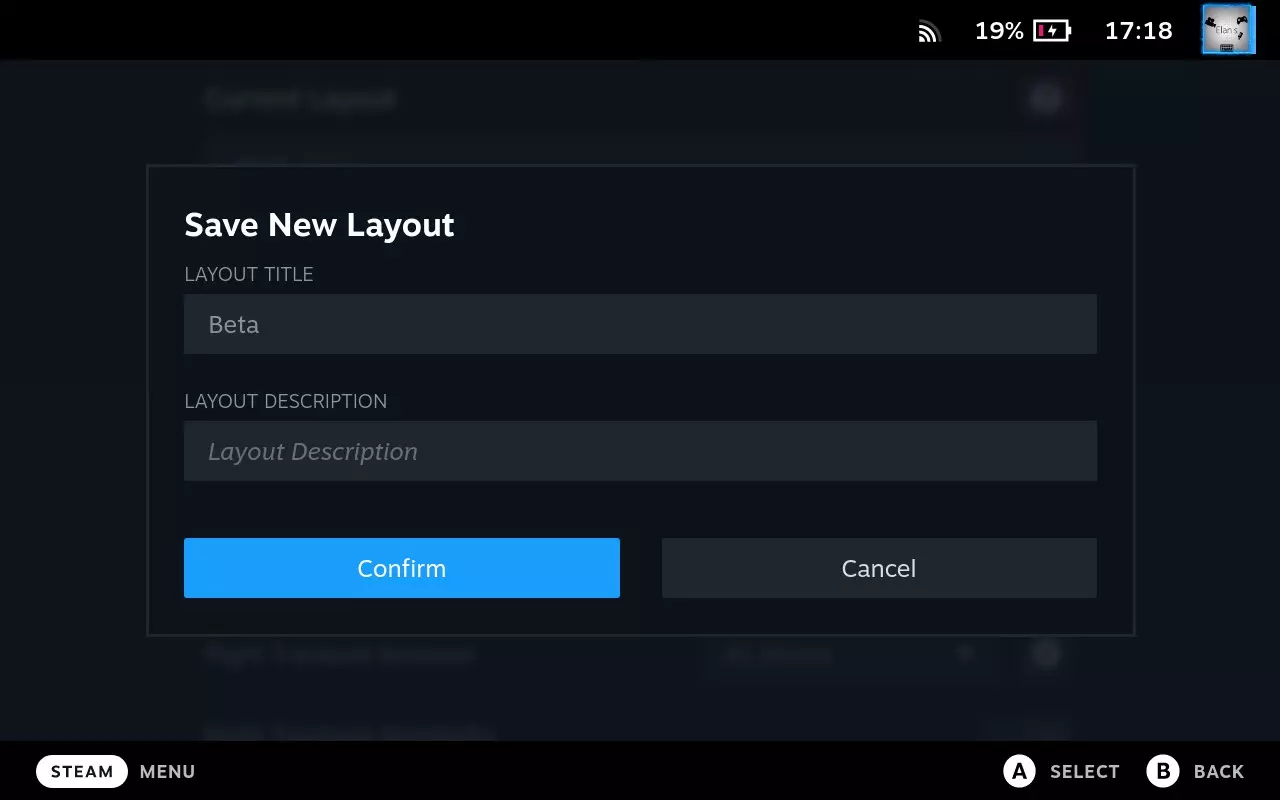
Now, everyone can use your configuration. If you want to easily share the workshop link (which will be useful for future configuration), you can access it using the Layout Details option. 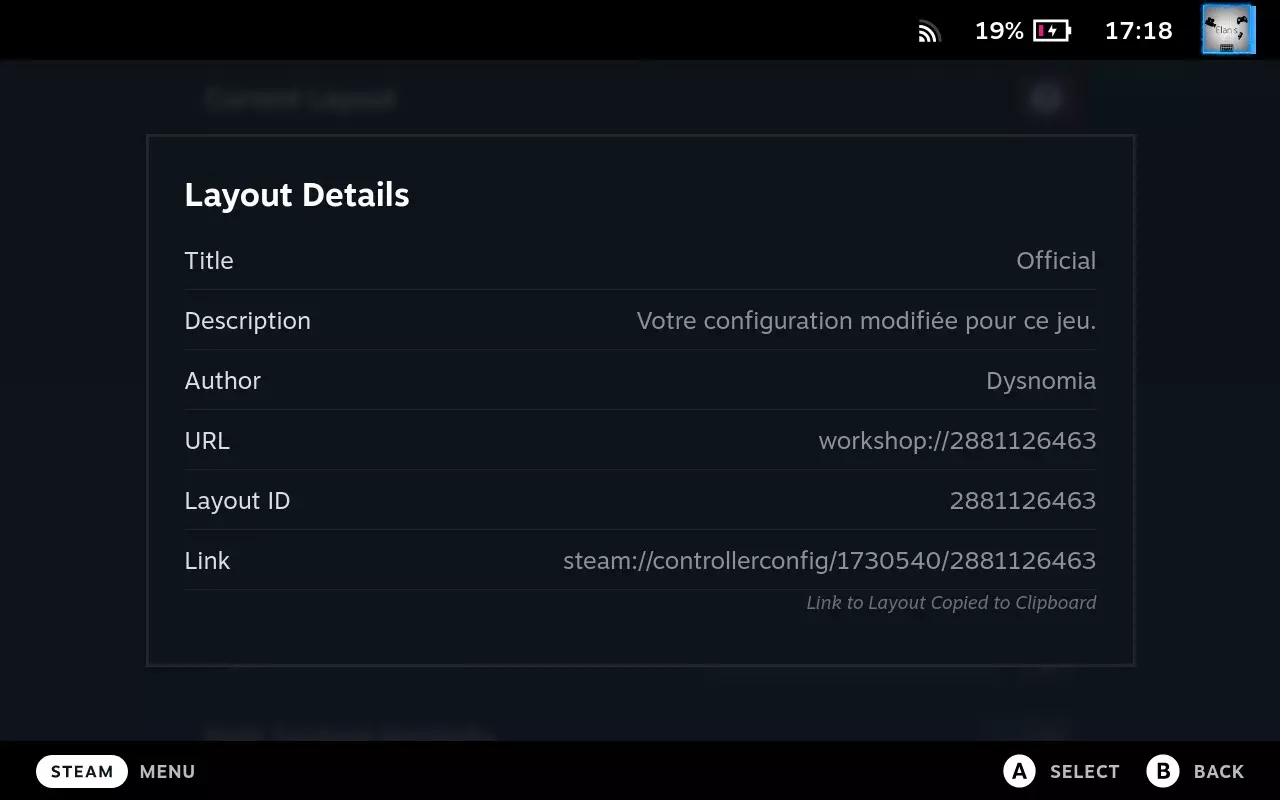
Create your configuration (Steam Desktop version)
You can follow the same steps to create a configuration using a Steam desktop, to access configuration, open overlay, and click on “Controller configuration”. 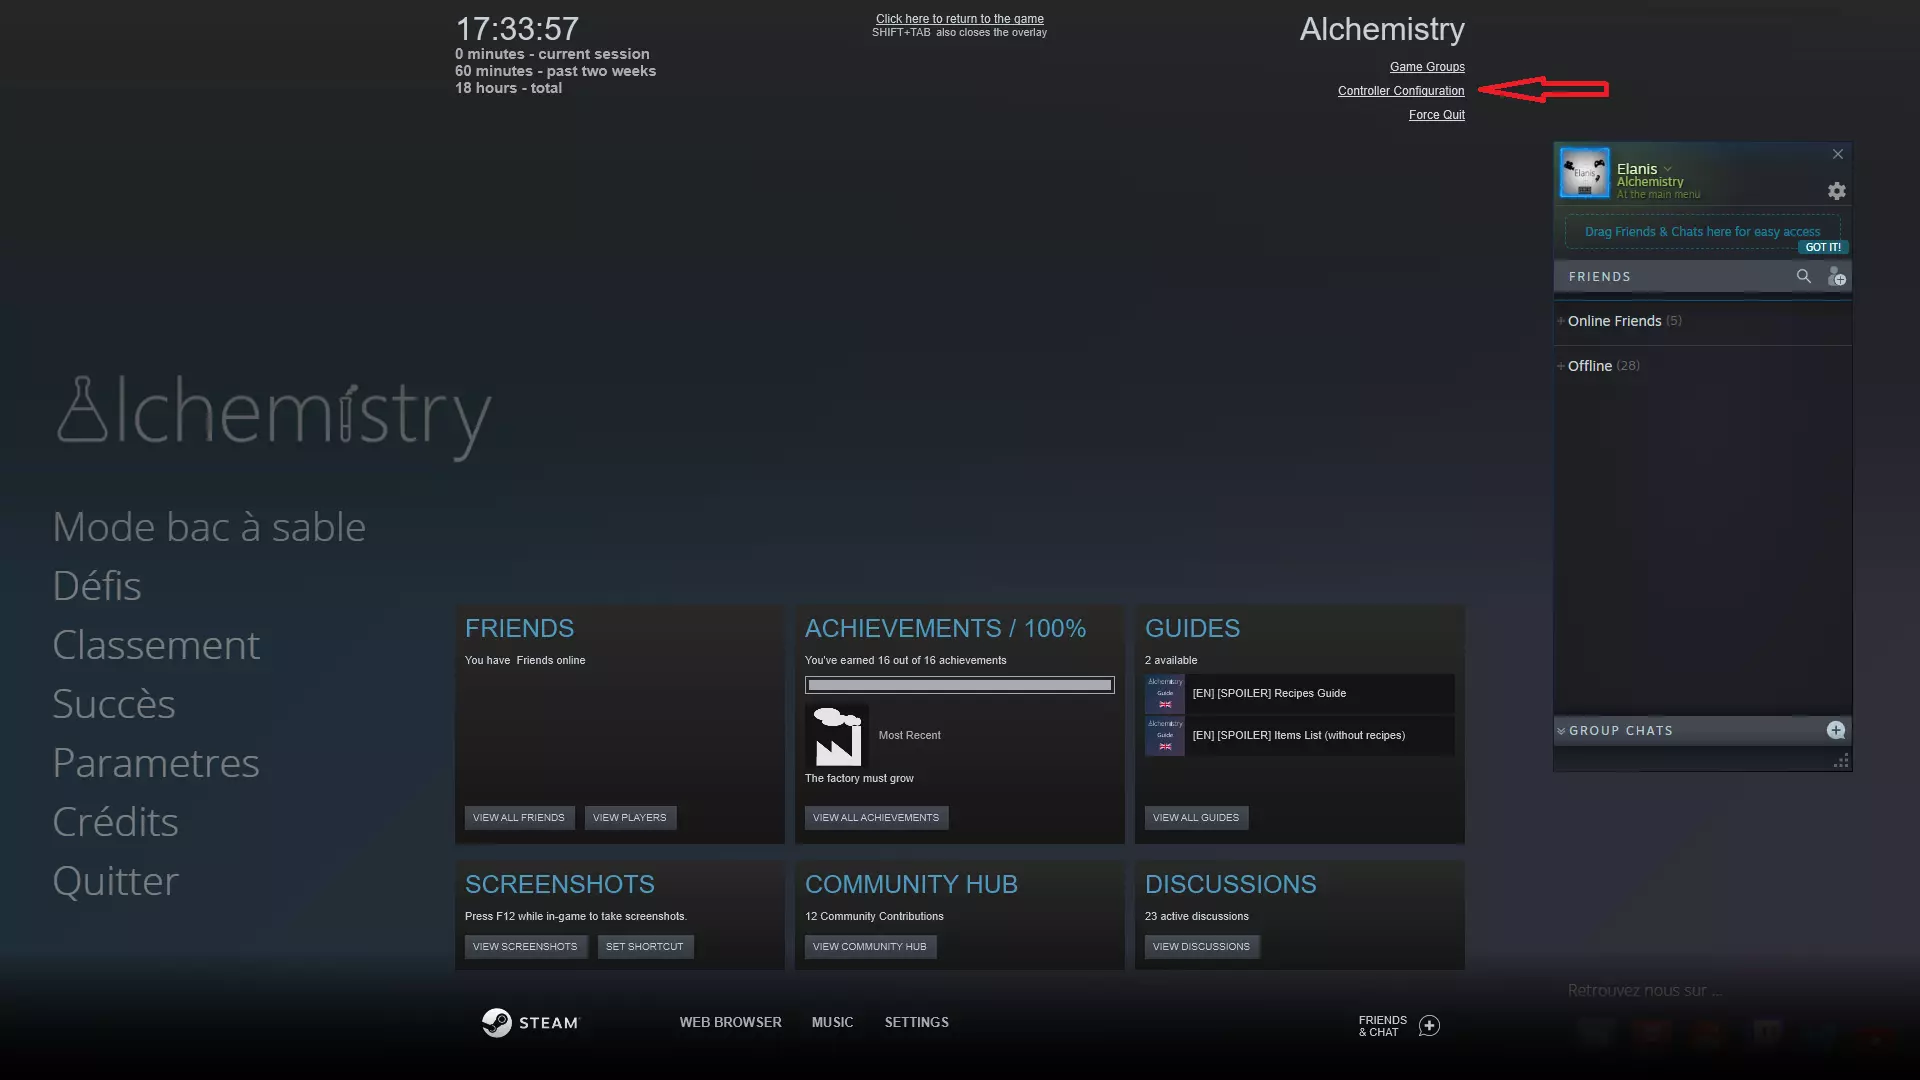
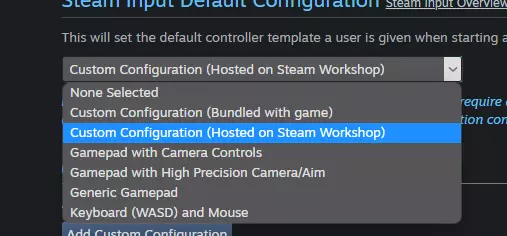
Set your configuration as the official configuration
Go to your Steamworks Partner account, then to App Admin, then to Application > Steam Input. Select your configuration type as “Custom Configuration (Hosted on Workshop)”.
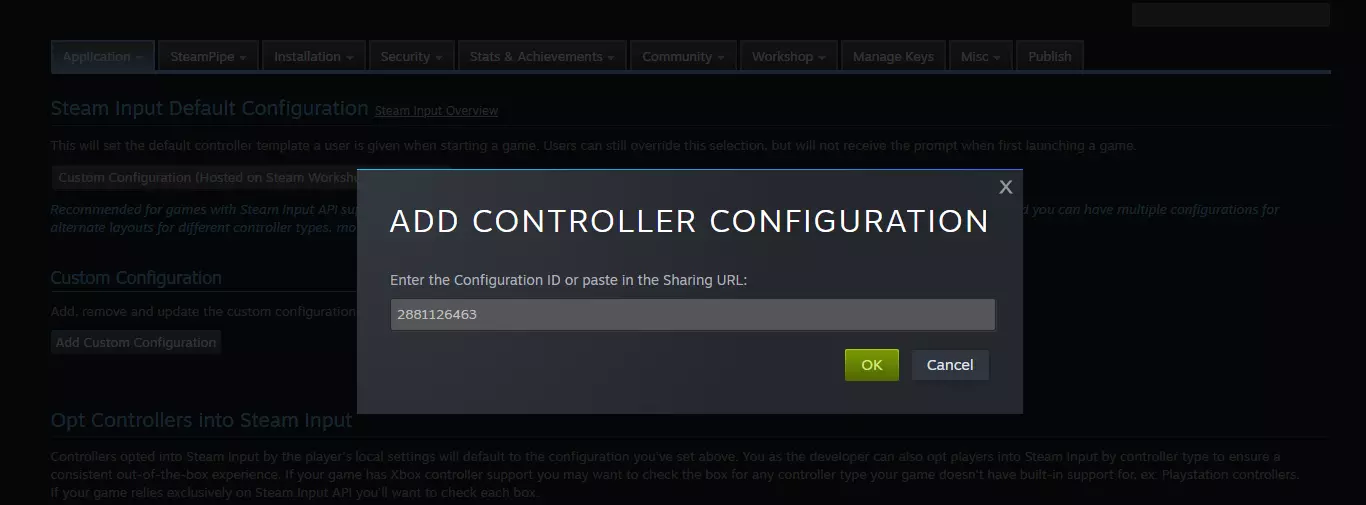
Then click on the Add custom configuration button and write your workshop ID into the popup.
You can now choose the branches you want to apply this configuration for:

And finally, you can publish changes. And here we are!